
This tutorial is intended for multi-core processor only.
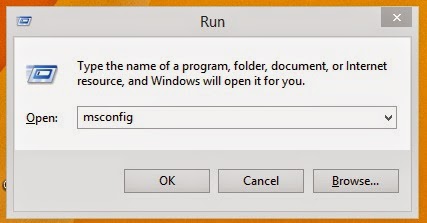
Step 1. Click the windows start button or press windows key +R and a RUN application will appear on your screen.
Step 2. Type MSCONFIG and click OK press enter key.
Step 3. A new window will appear go to BOOT tab then click the advance options.

Step 4. A new window will appear again.
Step 5. Place a check mark on "/NUMPROC=" for windows xp and windows 7 or Number of processor for windows 8. In this tutorial I'm using windows 8.
Step 6. A drop-down list will become clickable. Choose the number of processor do you want to use with the machine on boot. for me i have a dual core then a choose 2.
Step 7. Click OK then the boot advance window will close and you will see the System Configuration window will appear from behind again click OK then restart your computer and see the difference.

keywords: boot, core, processor, boot up, speed up, computer, how to, tips and tricks


0 comments:
Post a Comment